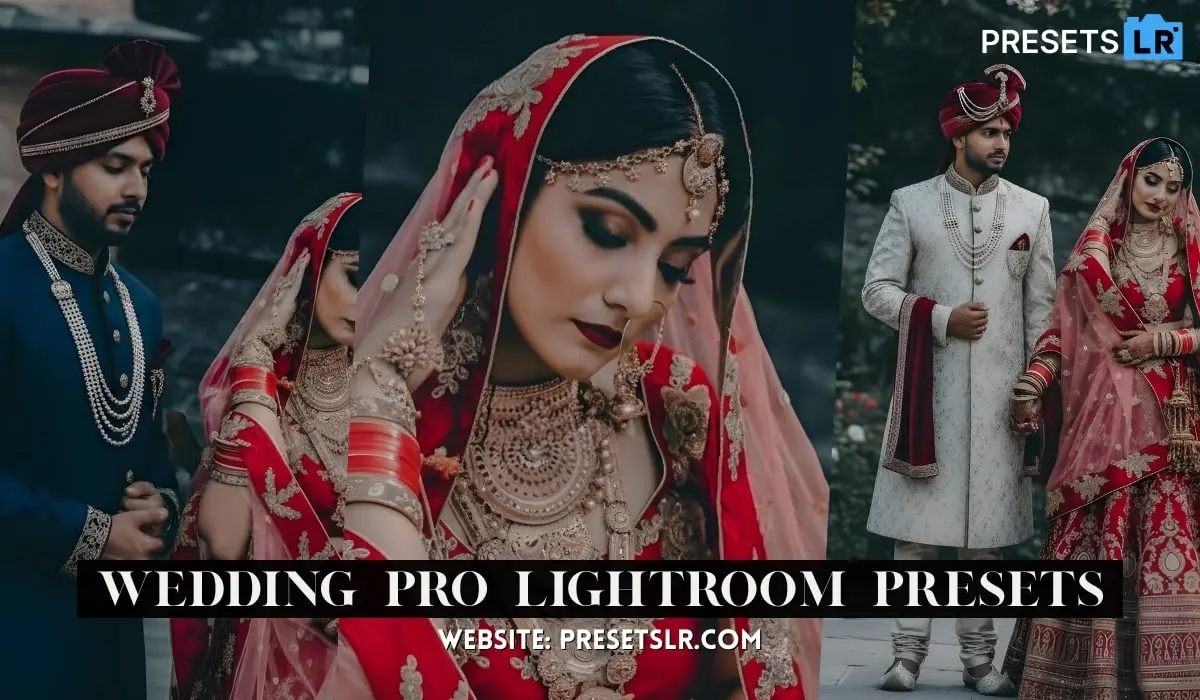
Wedding Pro Lightroom Preset – How to Edit Wedding Photos in One Click
Hello friends, how are you? hope you all are well. In today’s article I am going to give you Wedding preset lightroom. Using this wedding preset you can edit your photos in one click. You can definitely download it for free without any problem. So, let’s see how to Use & download this amazing preset.
How to Use Wedding Pro Preset:
Open / Import Presets in Lightroom Mobile
Method 1: If Your Preset is a DNG File
This blog very helpful for create Wedding Photos Editing presets easy step
Step-by-step:
Download the preset (DNG file) to your phone.
Open the Lightroom Mobile app.
Tap “+ Add Photos”.
Select “From Files” or “From Gallery” (wherever your preset is saved).
Choose the DNG preset file → tap Add.
Open that DNG photo inside Lightroom.
Tap on the three dots (⋮) on the top right.
Choose “Create Preset”.
Name your preset → tap Save.
Lightroom Mobile Presets features
One-tap photo editing
Consistent color and style across images
Adjustable intensity (slider to fine-tune the preset)
Works on RAW and JPEG photos
Batch editing (apply preset to multiple photos)
Professional color grading and tone control
Enhances workflow speed and efficiency
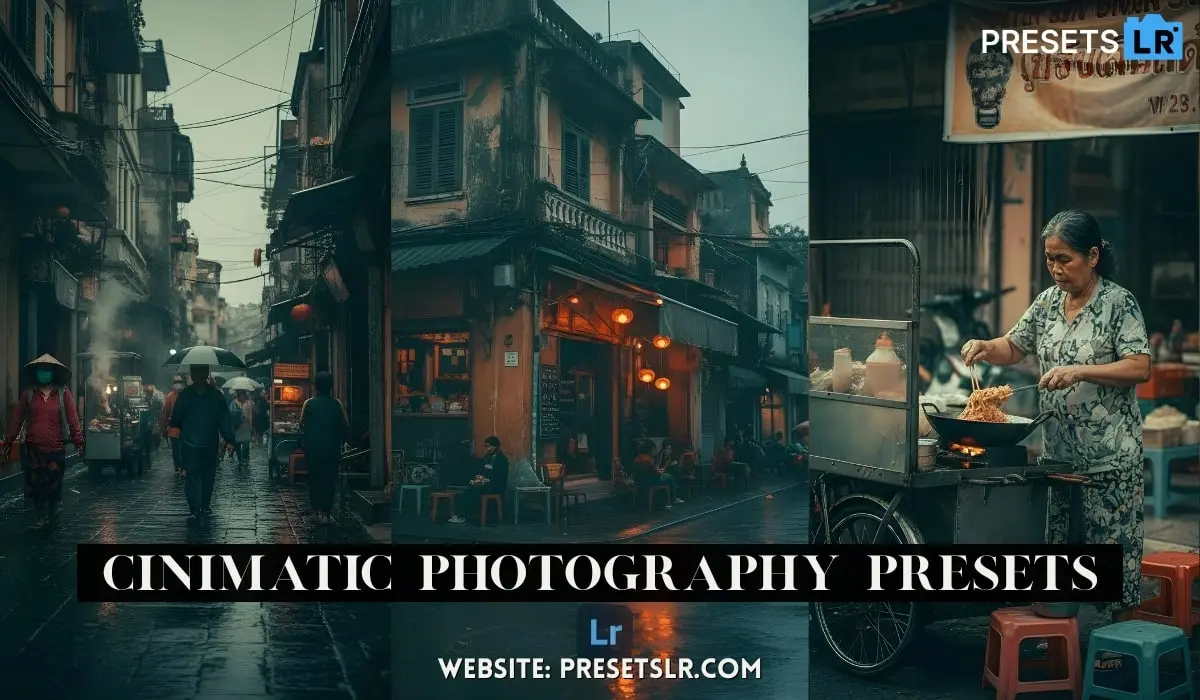
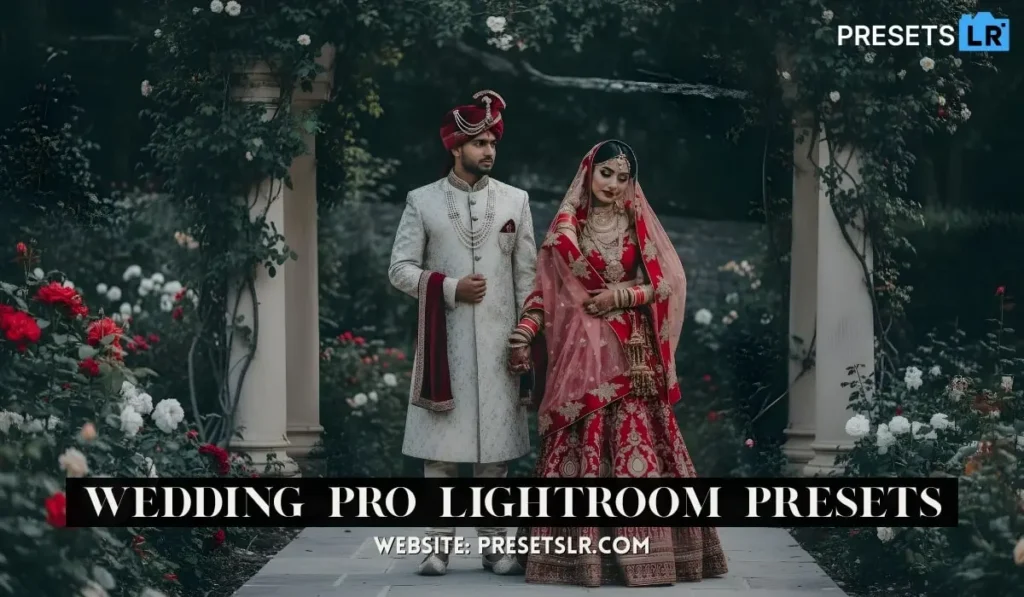
Wedding Pro Preset
How To Create This Wedding Pro Presets in Lightroom Application Easy Simple Step.
Today we’ve brought another premium photo-editing tutorial for you. So let’s start. First, I’ll reduce the exposure. Okay? You can see the background is appearing properly clear now. Right? Then after that, we’ll increase the shadows a little. Yes. Then we’ll reduce the highlights a bit. Okay? And both highlights and whites need to be reduced. These two almost do the same job. Alright? Then after that you need to go down and here in the Color section you’ll see Temperature. Okay?
In Color, the temperature you see here is in Kelvin. Alright? So you can adjust it up and down. Like I’m setting it to 5100 right now. And I’ll reduce the tint. Okay? Alright? Let’s scroll down a bit, friends. Here you’ll see Effects. In Effects, you’ll see Texture, Clarity, Dehaze. Okay? So we’ll increase the Dehaze option slightly. Okay? What this basically does— you know what? If there’s a bit of haziness in the background, like fog in the background, it reduces that. But don’t overdo it. We’ll keep it only around 4. Okay? You can adjust based on your photo. Alright?
Here you’ll see Luminance. First scroll a little down and you’ll see Color Mixer. Go into Color Mixer and then go to Luminance. After going to Luminance, increase the orange. Okay? This will slightly brighten your skin tone. Then after that we’ll adjust the yellow a bit. Then we’ll adjust aquas or blue. Okay? Alright. Then after that we’ll go to Saturation. Increase orange slightly and reduce yellow a bit. Okay? Go to blue here and adjust it based on your photo. You can also adjust aquas. Okay? And scroll a bit down.
Here you’ll see Color Grading, friends. Okay? So what will I do first? You don’t need to do color grading only here. When you move this… like if I drag it toward orange and increase it, you can see wherever there’s orange in the image, it will boost those sections. Okay? Then after that you need to go to Shadows. For shadows, if I take it slightly toward red and increase it, okay, it increases red tones in the shadows. Then we’ll move it a bit toward blue and also increase highlights a little.
Okay. Then scroll further down. You’ll see Calibration. In Calibration you’ll see Red Primary, Green Primary, and Blue Primary. Today I’m going to work only in Blue Primary. Okay? From here I’ll decrease the blue hue and increase the saturation. Alright? That’s fine. Okay. Then after that, go up and once again go to Masking. Okay? After going into Masking, you’ll see Linear Gradient, Brush Tool, Object, Landscape, and then Radial Gradient, Range, etc. Okay? Then as you go down, you’ll see the People option. Do you know what People does?
Like here, it detected both male and female. Okay? It’s a couple. So when it shows Person 1, that means it’s selecting the male. Right? And Person 2 is selecting the female. So it gives you a basic option to start with. If you want, you can use this or you can do it manually. We will do it manually. Alright?
Here you see Linear Gradient. Drag it from top to bottom and subtract the subject. Okay? After that, I’ll reduce the highlight, reduce shadow, and reduce whites. Okay? Then again take the Linear Gradient and drag it from bottom to top, subtract subject, and again reduce highlight, reduce white, and reduce shadows slightly.
Okay? Then we’ll create a new mask and take Radial Gradient. Okay? Apply it slightly on their faces. Alright? Increase the shadows a bit. You can adjust all this based on your photo, depending on the intensity you want. Then I’ll take the Brush Tool once more and lightly brush over the lower side of their faces from this side. Okay? Alright. Increase shadows a bit. Okay. Also brush a bit on the hands. Okay. This seems a little too much. So I’ll reduce it slightly. Okay? Reduce the highlights a bit.
Alright? So this is almost done. Okay. In the same edit, we’ll open this in Photoshop. So after opening in Photoshop, friends, what you have to do is— first crop the photo in Instagram size if you’re uploading on Instagram. Okay? Like I’ll crop it properly here and then cut and expand it. Okay? I’m going to center-align it. Alright? And then expand it. And press OK and generate. This will take a little time, friends. After that, it will show results. You can save or select any result it gives. Okay?
So it has given me three options. I’ll choose the first one. Okay? Then I’ll give it a little feather. Okay? After that, we will select again and write something here. You can write anything you want. Or if you need, tell me in the comment box— I’ll prepare a prompt (prp) for you. This is very easy, friends. It’s not something you can’t do. Anyone can use it and edit great photos. Photo editing is an art. The more creatively you create it, the better it becomes— beyond what you imagine. You just have to give time to everything. Like here, it has again given me three options. I’ll select any one.
Okay? This one looks good. Alright. I’ll take the Lasso Tool once again. You have to take the Lasso Tool. And like I select here— I’m going to write “Forget Water.” The better your prompt is, the better result it generates. So you also need to pay attention to the prompt— what we type and how we type. That’s how it works properly. You see, we typed “gift,” so it gave some options. We will select one of them. Yes. [Music] This one is also good, and that one is also nice. Okay? We’ll choose this one. Alright.
Again, I’ll take the Lasso Tool, go here, select this area, and write again. Friends, whether it’s pre-wedding photos or wedding photos— making them is very easy. You just need to give it some time, and by watching our videos, you can do a lot of things. They’ll be very helpful for you.
Yes. So it has given some options here. We’ll choose one— this one. Okay? Increase the feather. Increase the feather for all generative expands you have done. Okay? After that, press Command + Option + Shift + E to open a new merged layer. Then press Command + Shift + A to open Camera Raw. Okay? So the photo is open now. Then we’ll again do proper color grading and masking. For now, I went to masking first. After entering masking, I’ll open a Linear Gradient and drag from top to bottom. We do this so the photo never looks artificial. Right? This part that didn’t get selected properly— adjust it according to your image. I’m not editing fully right now; I’m just showing you. When you do it, use Add with the brush and do it carefully.
As I’m explaining, follow that. Increase shadow a little here. Increase white. Scroll down. You’ll see Texture— reduce it. Reduce clarity. Increase this slightly. Okay. Go up again. Create a new mask. This time drag bottom to top. And this time do NOT subtract. Okay? Don’t subtract this time. Increase shadows a bit. Increase whites. Reduce texture. Reduce clarity. Increase Dehaze slightly. Reduce clarity more. Okay? Create a new mask again. Take Radial Gradient and add a slight effect on the faces— a little yellow. Okay? Increase shadows. Increase contrast slightly.
Okay? Create new mask again. Every adjustment must be on a new mask— don’t do everything in one mask. Okay? Take Radial Gradient again and drag here. Increase shadow. Scroll down. Reduce clarity and texture. Increase this slightly. Okay? Adjust clarity to match earlier settings. Make sure it doesn’t look artificial. Then create a new mask— Linear Gradient bottom to top. Subtract subject. Now since the subject is excluded, I don’t want grass and trees selected either. So take Brush Tool, increase its size, and remove these parts carefully. We only need to work on water now. Remove properly according to your need. Okay? Then reduce exposure slightly. Yes. Reduce highlights a little. Reduce whites. Reduce shadows. Scroll down. Reduce texture and clarity and increase dehaze slightly. Okay? This looks fine now. Open it in Photoshop.
Okay? So the thing is— I don’t want their legs to show. So I’ll use Generative Fill to see if it removes them. If they get removed— good. If not, we’ll figure something else out. [Music] We haven’t even done color grading yet, friends. This is still a normal photo. We’ll do color grading too. There’s still a lot to do. Yes, it removed them. We’ll use this one and feather it slightly. Okay? We’re not doing skin retouching. Go down. Selective Color. First select Red. Then increase Black slight— or reduce slight. Like when I move it toward black, it becomes deeper. When I move it away, it becomes lighter. So we’ll increase it a bit. Only slightly. Keep small adjustments for all settings. Okay? Move slightly toward blue. Then slightly toward magenta and slightly toward cyan. Then go to Yellow.
In Yellow, move slightly toward black. Then toward red a bit. Okay? Then adjust toward green and blue slightly. Okay? Then go to Green. In Green, take a slight yellow tone and darken (increase black) a bit. Same for the next values— reduce black slightly. Then go to Blue. In Blue, increase highlights slightly. Adjust according to your photo. Okay? I’m just showing options— using these tools you can bring life into your photos. It’s all very easy if done properly. After that, we’ve applied a LUT. Reduce opacity to around 30. We’ll apply the same LUT again. Then go to Photo Filter.
Select Yellow tone— like warming filter 85. Reduce opacity to around 40. Then go to Color Balance. In Color Balance you’ll see Midtones, Shadows, Highlights. First in Midtones, move slightly toward cyan, then slightly toward yellow, then slightly toward green. Then go to Shadows— move slightly toward red and slightly toward blue. Okay? And for Highlights, move slightly toward red once. Done. Press Command + Option + Shift + E again to create a merged layer. Then press Command + Shift + A to go back to Camera Raw. After entering Camera Raw, scroll down. You’ll see options here.
Color Grading and Color Mixer. First use Color Grading. Like I’ll move it toward orange— a little yellow-orange— increase it. Move shadows slightly toward green— somewhere between green and yellow. Reduce shadows a bit. Then move highlights toward red and adjust slightly. Okay—we’ll keep it like this. Then go to Color Mixer. In Color Mixer, you’ll see greens— adjust them up or down. Adjust blues. Adjust yellows. Then go to Luminance. Increase yellow slightly. Reduce orange slightly. Okay? That’s almost done. Open the photo again in Photoshop and apply a LUT. I’ll give you this LUT in the comment box. Apply the same LUT. Keep opacity around 10. Or lower depending on your photo. Okay?
Then we’ll add text. Like friends, we’ll add some text here. I’ll paste the text I already copied. And remove “together” from here. Okay? Now it says “We Make The Perfect Pair.” We’ll set it properly. Press Command + T. Choose a good font. Like I’ve selected this one. Increase the size. [Music] Place it centered between them. This font doesn’t look very nice, so let’s choose a better one. Keep a simple font. This one looks nice. Place it in the center and reduce size a bit. Okay. Done. Now the part we removed earlier— we’ll also add “Together” inside this. Change its font too. Okay? We’ll increase the size of “Together.”
Select both text layers and the photo layer. Then use the Move Tool. Here you’ll see center align options— horizontal align and center align. This will align them properly. Set both properly. Now I’ll adjust the text color to match their skin tone. Okay? Done. This is how you can edit photos— very
easily. Follow us— we’ll teach you everything and show you how to edit photos
Here are the minimum system requirements for Adobe Lightroom Mobile App
Android
OS: Android 8.0 (Oreo) or later
Processor: Quad-core CPU (ARMv8 or x86_64)
RAM: 4 GB minimum
Storage: 32 GB minimum
➡️ Recommended: 8 GB RAM and 128 GB storage for smoother performance.
Adobe Help Center
iOS (iPhone / iPad)
OS: iOS 17.0 or later
Works on iPhones and iPads that support that iOS version.
📌 Some advanced features (e.g., Lens Blur) perform best on devices with ≥4 GB RAM.