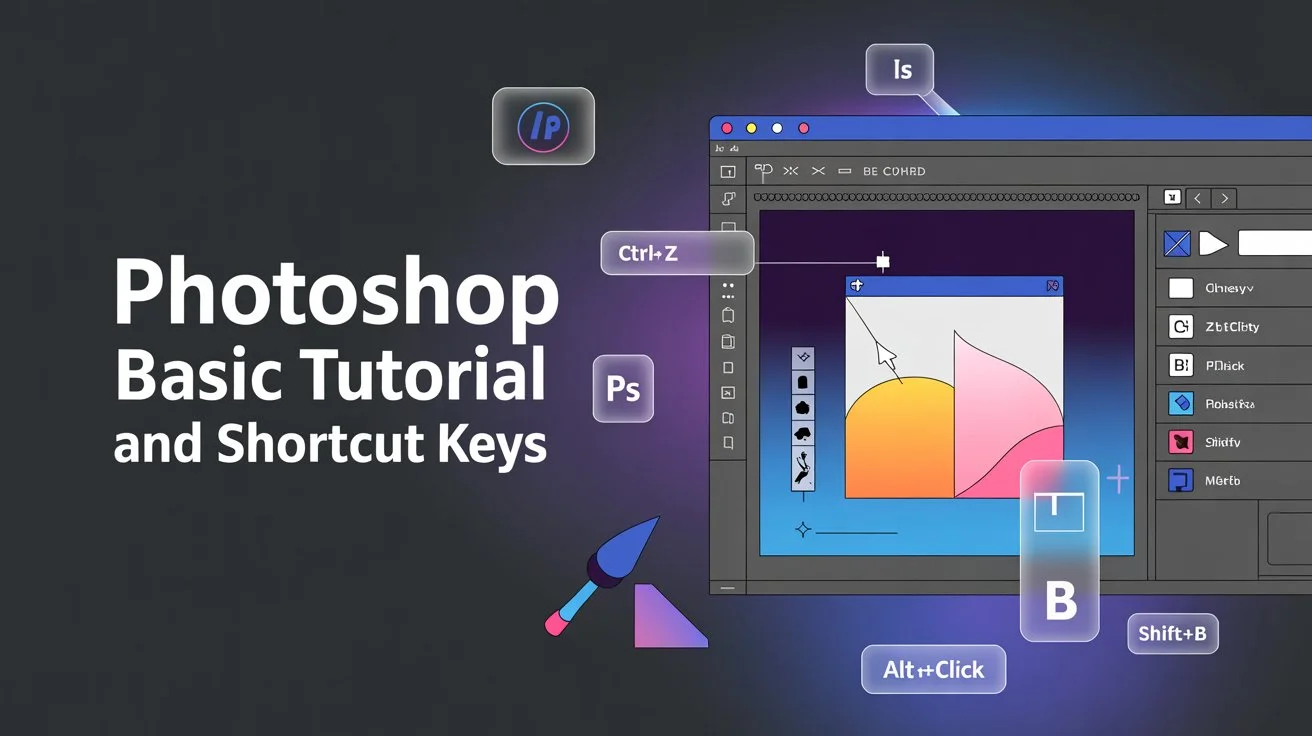
Chilling Decay Effect: Photoshop Tutorial (Step-by-Step Guide) With Free Brush
The creative decay effect is one of the most visually striking effects you can apply to a portrait in the realm of creative image modification. Learning this method is a terrific approach to improve your Photoshop skills, whether you’re making a dramatic image for your portfolio, an intense social media graphic, or a movie poster.
This expert Photoshop lesson will guide you through the entire process of creating the eerie decay effect, layer by layer. This Photoshop tutorial will walk you through every step of a thorough, repeatable process, from utilizing sophisticated selection tools to incorporating textures, lighting, and particle brushes.
Let’s begin.
1. Setting Up Your Work Area
Setting up your Photoshop workspace correctly is crucial before we begin adding the chilly, fading effect.
Get your base image (the subject or model) open.
Verify that you have downloaded all required stock resources, including textures, brushes, and flares. (The description includes links to all stock downloads.)
This guarantees a seamless project workflow.

2. Selecting the Model
In this Photoshop tutorial, separating the subject from the backdrop is the first important step.
Step 1: From the toolbar, choose the Quick Selection Tool (W).
Step 2: To pick the entire subject, carefully click and drag.
Pro Tip: To remove portions from the selection, particularly around delicate edges or background clutter, hold down the Alt key.
Step 3: Select > Select and Mask when you’ve finished your selection.
Select the Refine Radius Tool and use it to brush over any intricate edges or the subject’s hair.
Output To: Click OK after choosing New Layer from the dropdown menu.
At this point, the topic should be clearly separated from the transparent background.
3. Establishing the Scene
We’ll position our topic against a stark, contrasting background to heighten the effect.
Step 1: Drag the newly created layer beneath the Background Copy layer.
Step 2: Give this layer the new name “Background.”
Step 3: Select Contents: White under Edit > Fill, then click OK.
The textures and fade effect will stand out more thanks to this crisp white background.
4. Making a duplicate and getting the layers ready
We now start getting the effect and warp layers ready.
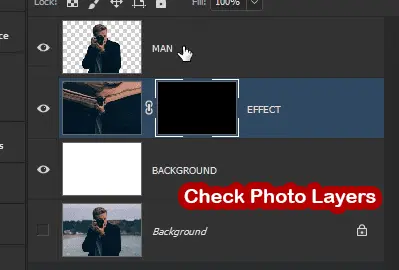
Step 1: Rename your subject layer to Effect while it is selected.
Step 2: Choose Duplicate Layer from the menu when you right-click on this layer. Click OK after renaming the new layer to Man.
Step 3: To apply liquify, hide the “Man” layer and choose the “Effect” layer.
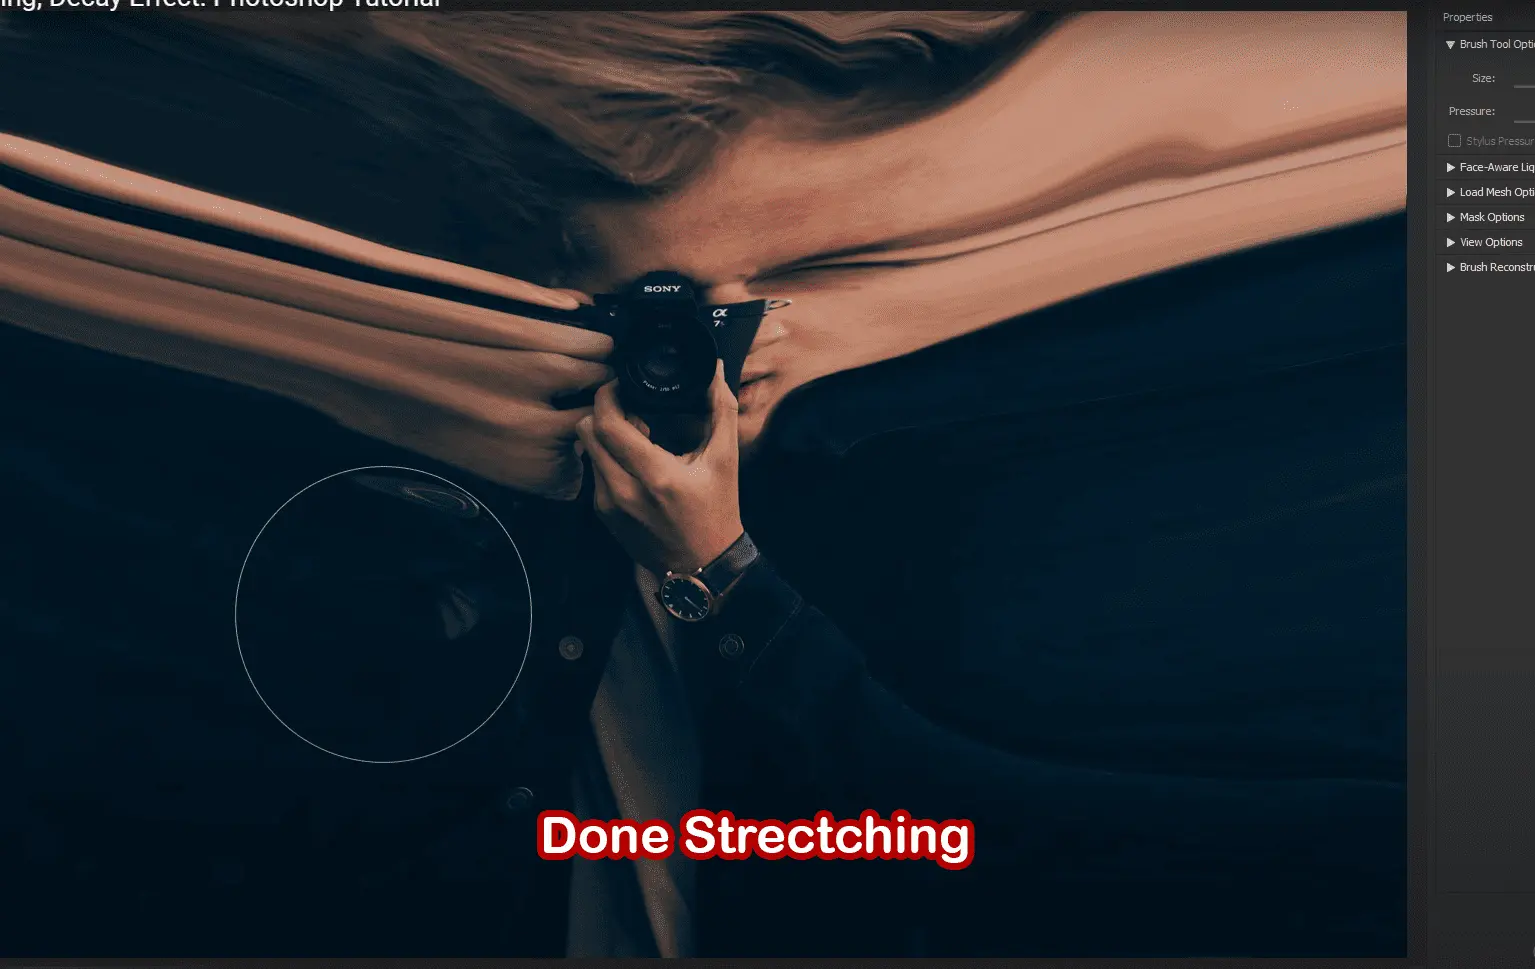
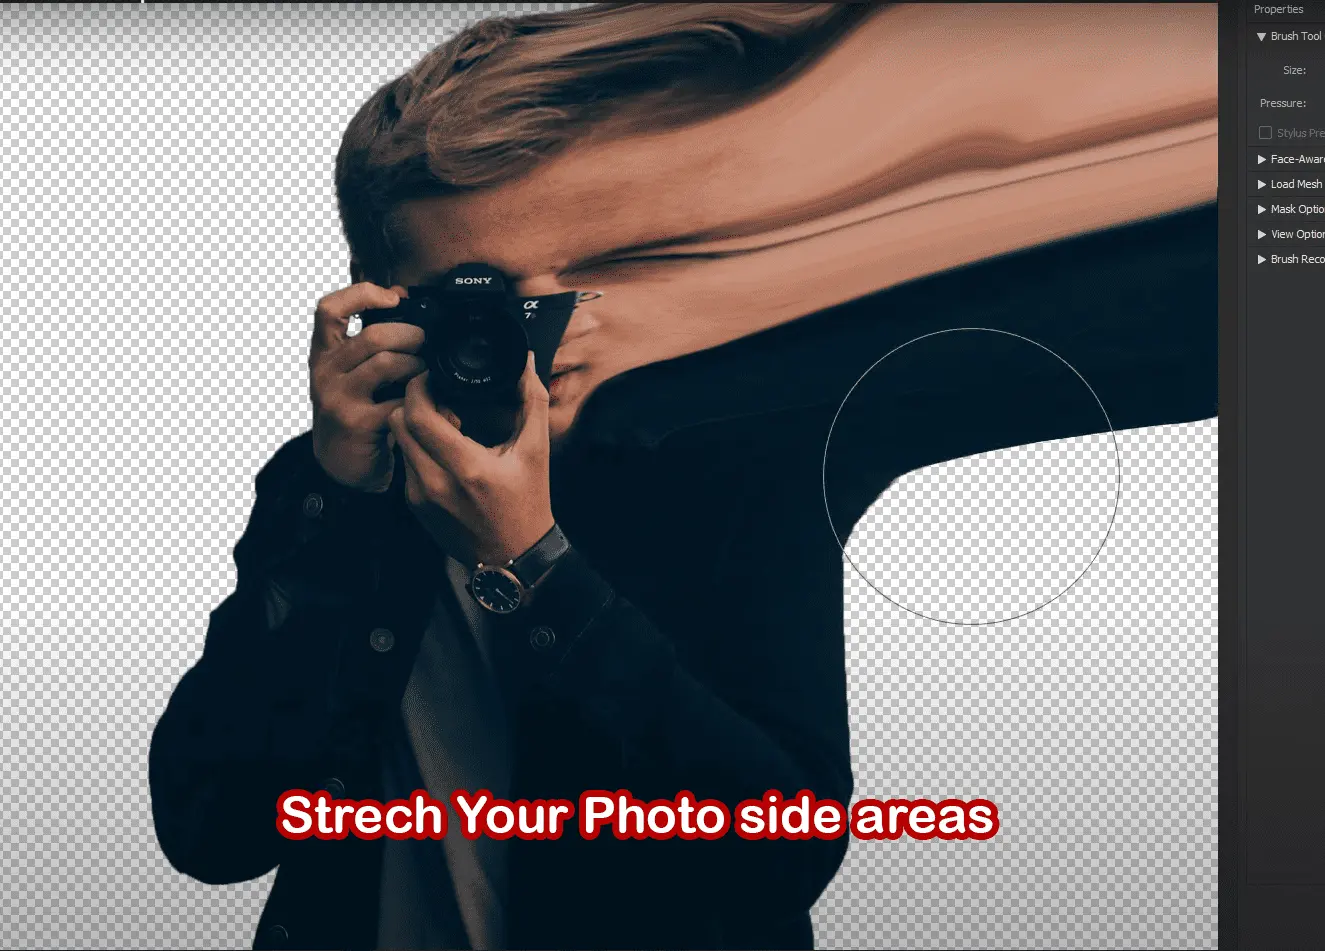
5. Subject Warping (Liquify Tool)
The direction and extent of the chilling and decay effect are defined in this stage.
Step 1: Select Liquify under Filter.
Step 2: From the panel on the left, select the Forward Warp Tool (W).
Push outward from the subject’s edges gently; visualize the model melting or dissolving into space.
Be imaginative, but refrain from exaggerating facial traits.
Click OK once you’re satisfied.
The “blast radius” of our decaying effect is defined by this distorted shape.
6. Disguising the Decay Appearance
To mix the distorted layer back with the original, let’s start masking it.
Step 1: To apply a black mask to the Effect layer, press ALT + Click the mask button.
Step 2: Choose the “Man” layer after unhiding it.
Step 3: To start masking, click on the thumbnail of the Effect layer mask.
Make Black the foreground color.
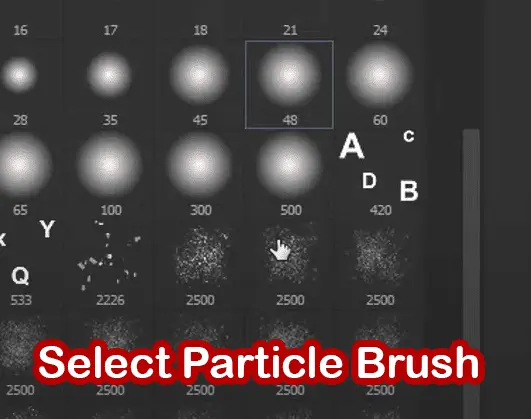
Download Broken Glass Brush & Use This Brush For Chilling Decay Effect:
Broken Glass Brush
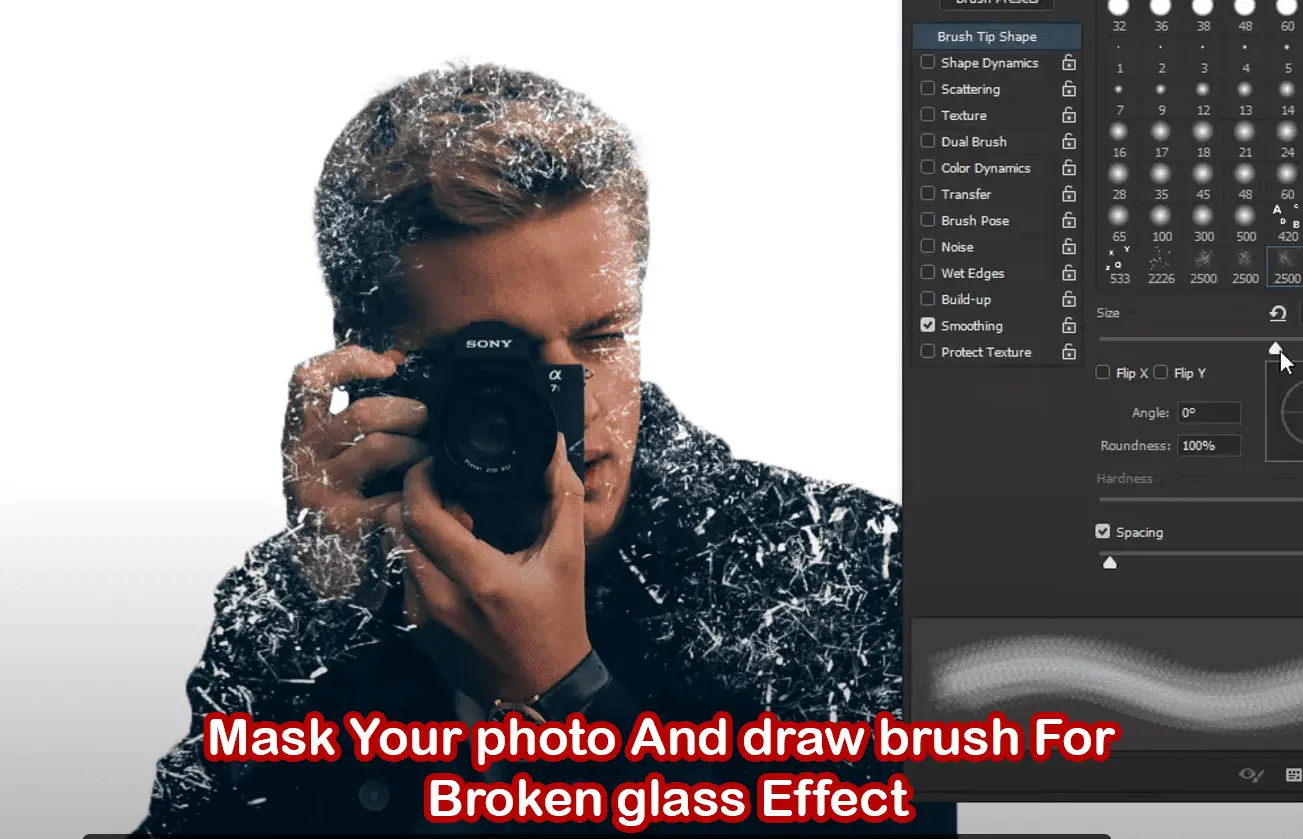
Select a particle or dispersion brush by selecting the Brush Tool (B).
Start brushing outward from the edges of the subject after reducing the brush size a little.
Change up the brush sizes and patterns often.
To reverse any excessively forceful masking, press CTRL + Z.
This simulates the degradation by progressively exposing the liquified layer.
7. Using White Masking to Reveal Details
Black regions have been masked, and details are currently being added back selectively.
Change the color of the foreground to white.
To expose certain areas of the warped region, select a different particle brush and repeat the masking procedure.
This procedure aids in the natural integration of the subject and the distorted particles.
Remember to rotate and change the brush size ([ or ] ) as necessary.
8. Using the Mixer Brush Tool for Blending
To make color changes more seamless:
The Mixer Brush Tool (B) should be selected.
Configure these values:
Wet: 25%
Load: 42%
Mix: 100%
Flow: 100%
Where colors are too harsh or unnatural, lightly brush those areas.
This stage gives the decay effect realism and smoothness.
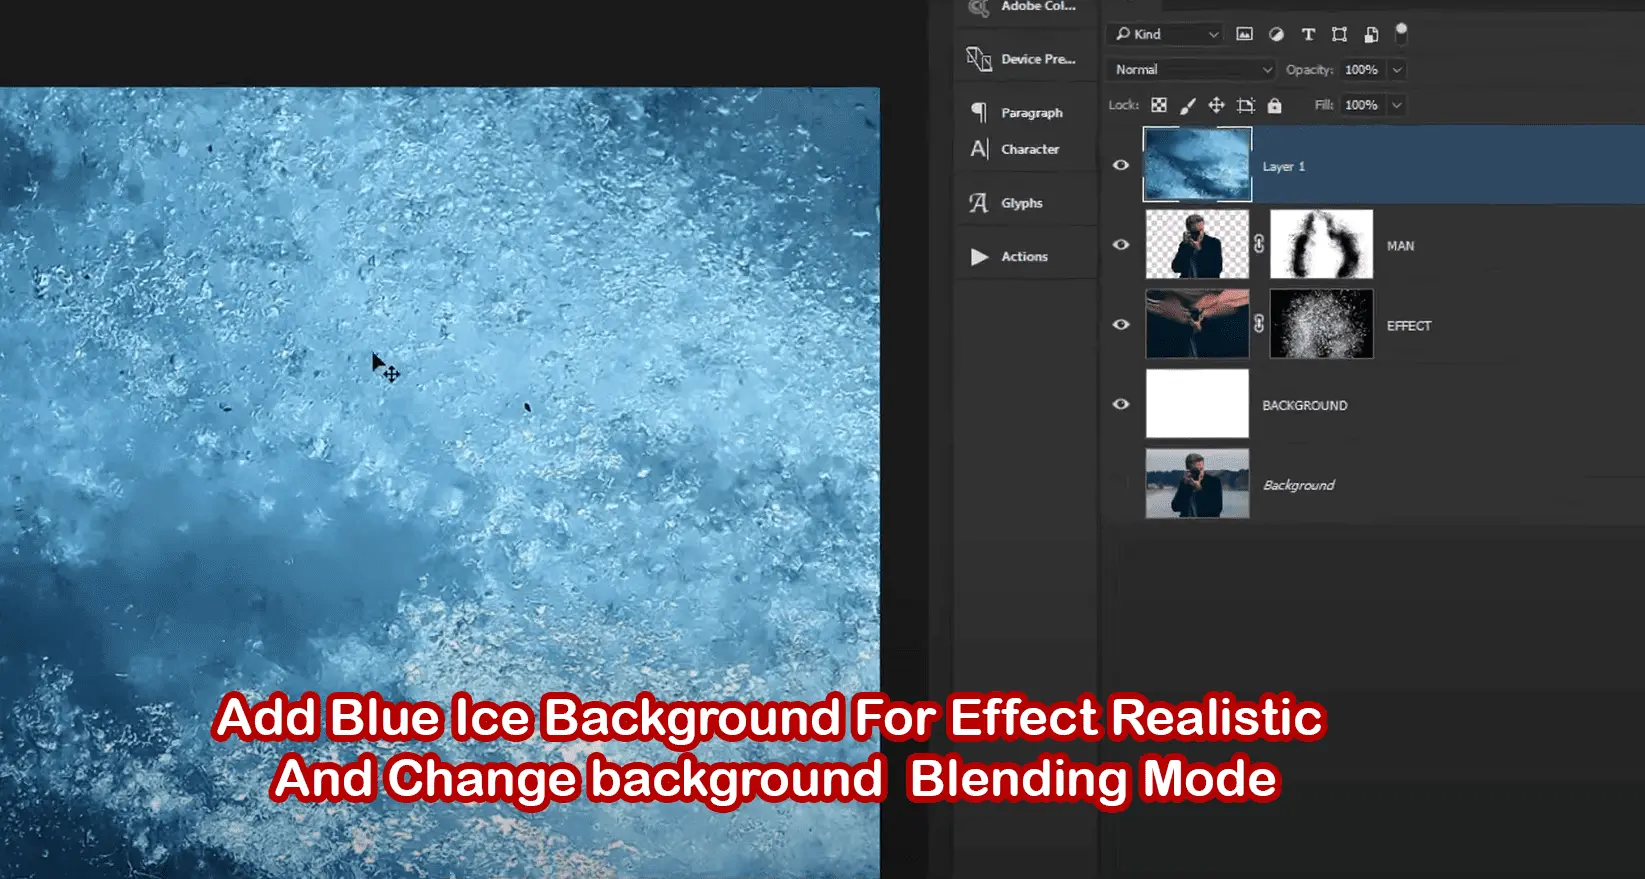
9. Including the Texture of Ice
Let’s apply an ice texture overlay to intensify the chilly vibe.
To apply your ice texture to the canvas, drag it there.
To center it, use the Move Tool (V).
To enter Free Transform, press CTRL + T.
To resize proportionately, hold down ALT + SHIFT and drag outward.
To apply, press Enter.
Switch to Overlay as the Blending Mode.
Opacity should be reduced to about 70%.
Change the layer’s name to “Ice Texture.”
10. Including Texture in the Camera’s Lens
To improve the area of the camera:
On to the canvas, drag your second texture.
To resize it over the camera, press CTRL + T.
To add a black mask, press ALT + Mask.
Set the Foreground to White using the Brush Tool (B).
Paint lightly so that only the camera can see the texture.
Switch to Overlay as the Blending Mode.
This layer should be renamed Lens Texture.
11. To achieve dramatic lighting, use a light flare effect:
Make a new layer and give it the names “Light” or “Flare.”
Select Color Dodge as the Blending Mode.
Set #00c6ff as the foreground color.
To apply color, select Brush Tool and click once on the camera lens.
If the opacity is too strong, reduce it to roughly 60%.
As a result, the lens has a bright, cold shine.
12. Completing the Composite Combine and improve your image:
To combine all visible layers, use CTRL + SHIFT + ALT + E.
Give this new layer the name “Merged.”
Select Convert to Smart Object with a right-click.
Select Brush Strokes > Accented Edges under Filter > Filter Gallery:
Width of Edge: 1
38 is the edge brightness.
3 for smoothness
Press OK.
Use the Brush Tool (White) and ALT + Click on the mask to apply the effect only where necessary.
13. Including a Last Lens Flare to Boost Realism:
A lens flare image can be dragged onto your painting.
Use the Move Tool (V) to position it over the lens.
Switch to the Screen Blending Mode.
Give the layer the new name Lens Flare.
This gives the picture a more polished, cinematic look.
14. Improving the Finished Picture
To improve the outcome:
To create a final merging, press CTRL + SHIFT + ALT + E one more.
Change this layer’s name to “Sharpen.”
To sharpen more, select Filter > Sharpen.
Layer opacity can be somewhat decreased if it’s too intense.
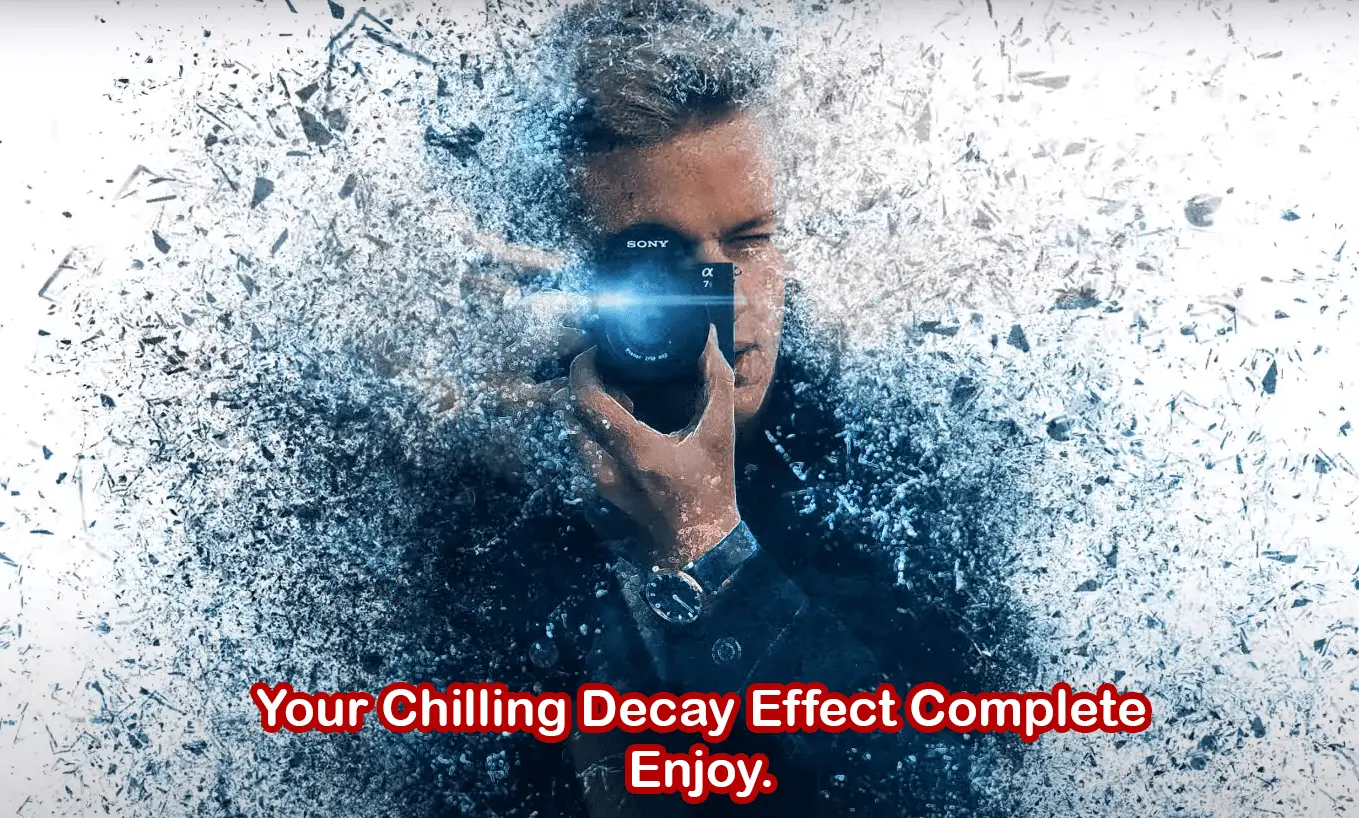
Save Your Decay Chilling Effect & Enjoy.
Conclusion: There you have it: a Photoshopped, fully realized, eerie deterioration effect. To make your project come to life, this expert Photoshop lesson covered advanced masking, texture overlays, light flares, liquify warping, selection techniques, and final sharpening.
This decay effect effect is flexible and effective whether you’re creating a poster for a suspenseful film, an emotional portrait, or are simply experimenting with artistic effects.
Do you want to go farther? For more dramatic flair, try combining this with smoke overlays, dust particles, or frozen frame effects.
Photoshop Tutorial
Liquify Tool Photoshop
Particle Brush Masking
Add Texture in Photoshop
Light Flare Overlay Photoshop
Disintegration Photoshop Effect