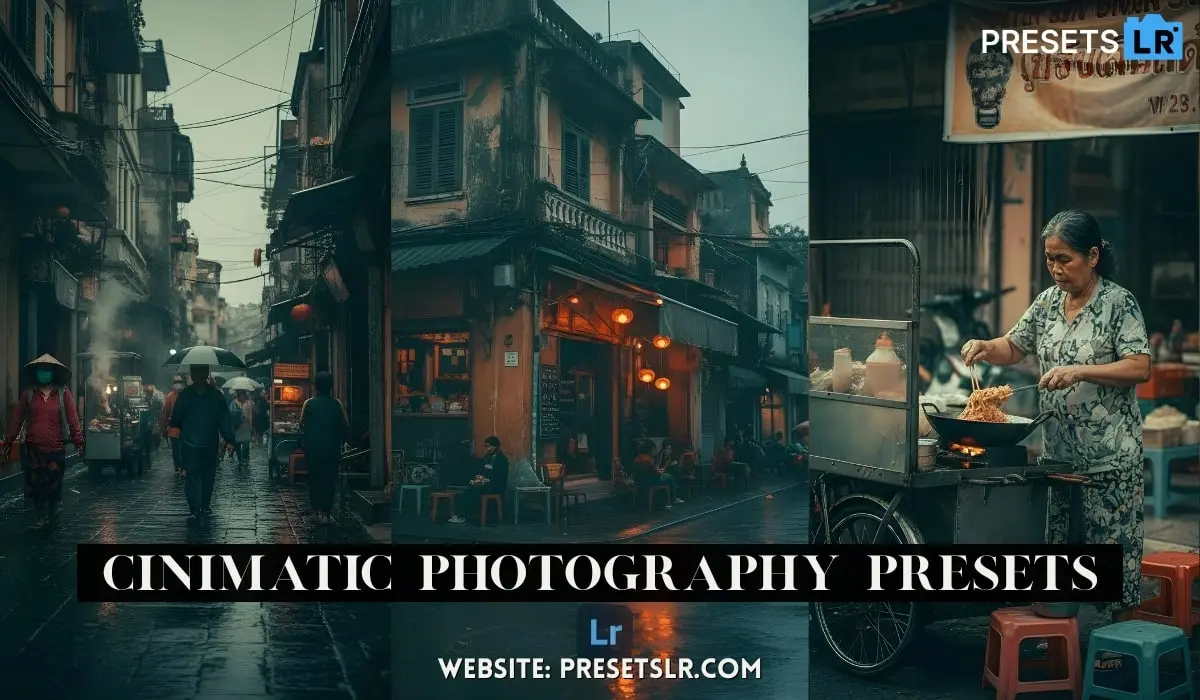
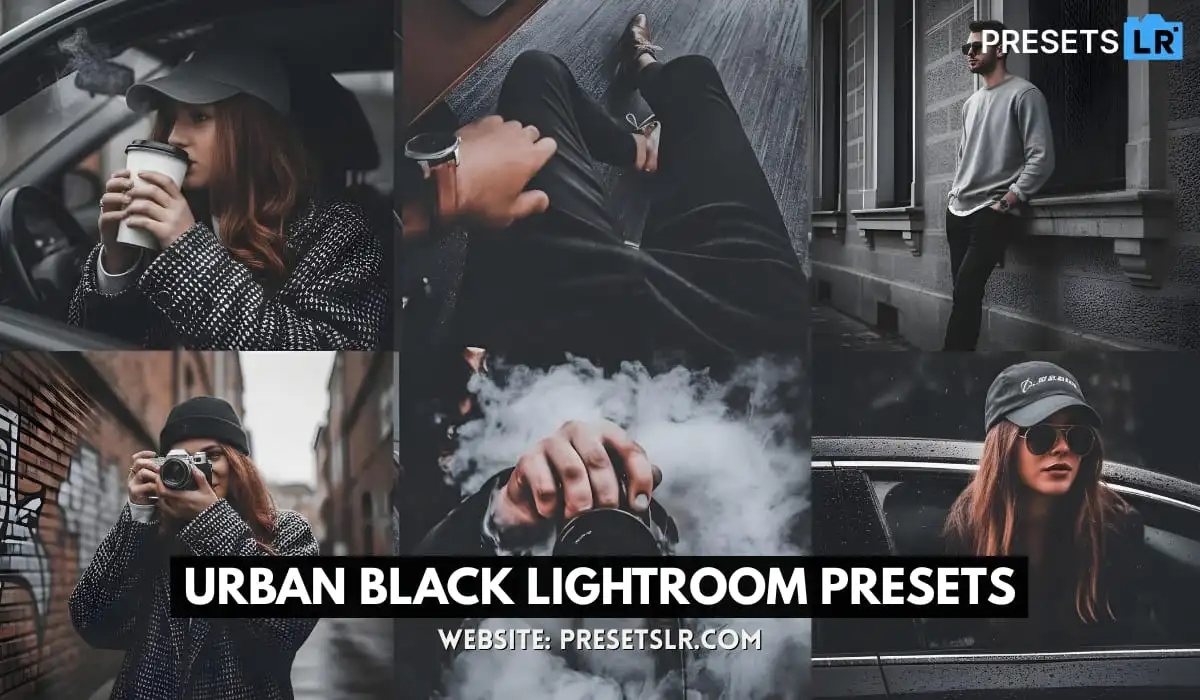
Looking for the perfect sunset Tone Lr preset to make your photos look cinematic and professional? You’re in the right place! In this post, I’m sharing a Sunset Tone LR Preset Free Download that works beautifully on Lightroom Mobile and Lightroom Desktop.
With these Lightroom Mobile Sunset Presets Free Download, you can edit your golden hour shots in just one click. Whether you’re working on sunset portraits or landscapes, these Sunset Lightroom Presets Free Download files will give your images the warm, glowing tones you’ve always wanted.
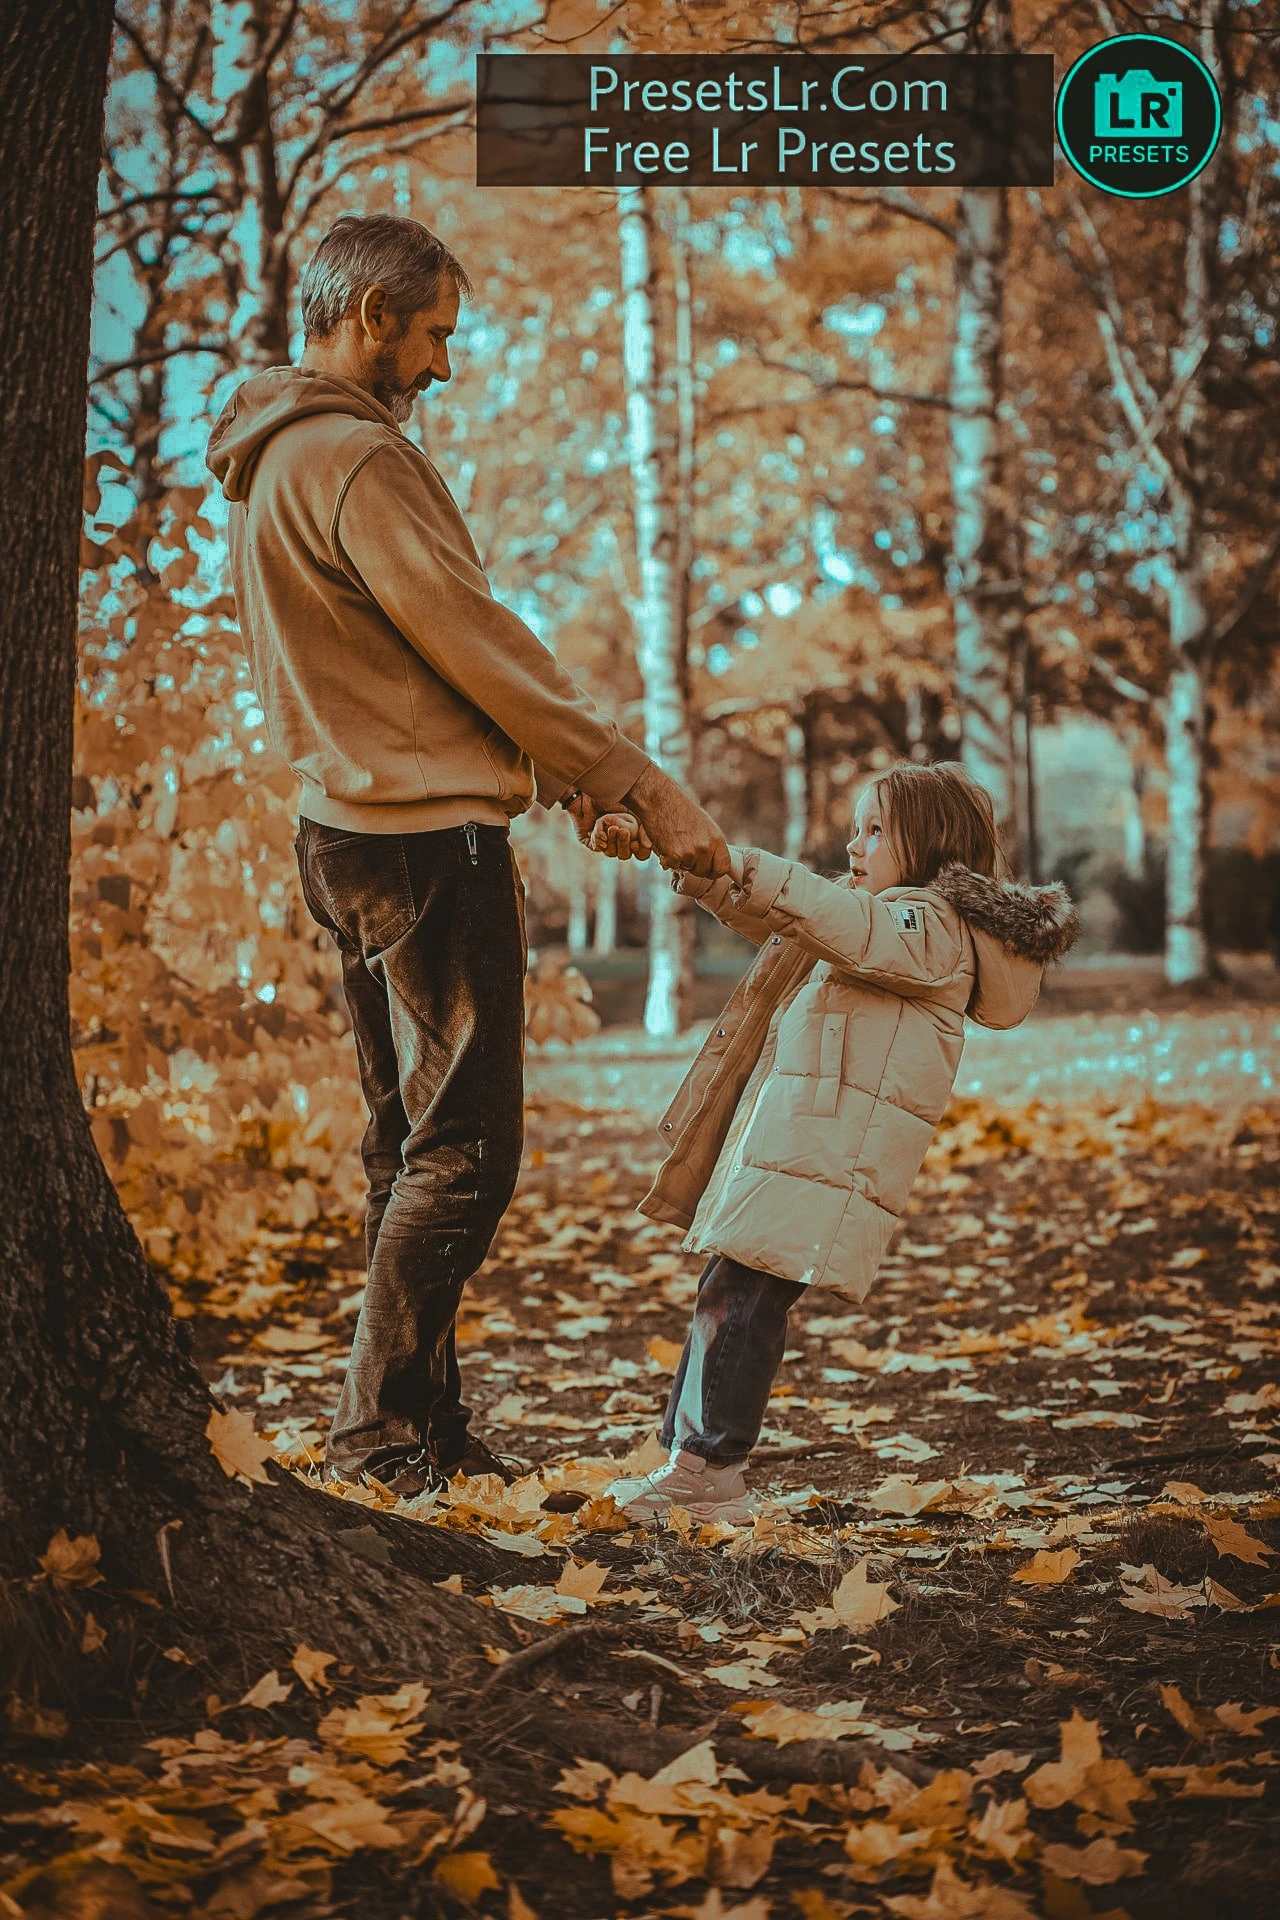
Basic Lighting Adjustments
Go to Light → Adjust the following:
Contrast → Reduce (~ -90)
Shadows → Increase (~ +84)
Blacks → Slightly reduce or balance (~ -10 to +5 depending on photo)
Highlights → Reduce (~ -33)
Whites → Slightly reduce (~ -5 to -10)
Exposure → Adjust slightly if the image looks too dark or too bright.
Color → Mix (HSL) and tweak individual colors:
Yellow & Orange (Sunset Tone)
Hue → Shift slightly towards orange
Saturation → Lower slightly (~ -50 to -60)
Luminance → Slightly increase for glow (~ +16)
Blues (Sky Tone)
Hue → Move towards teal for softer skies (~ -40)
Saturation → Reduce to avoid oversaturation (~ -50)
Luminance → Slightly increase to brighten sky highlights.
Overall Temperature
Temp → Slightly increase (~ +10 to +20) for a warm sunset vibe.
Tint → Adjust slightly negative (~ -5 to -10) if photo looks too magenta.
Effects:
Texture → Reduce (~ -10) for smoothness.
Clarity → Slightly increase (~ +8) for crisp edges.
Vignette → Slightly darken corners (~ -8 to -10).
Dehaze → Slight plus (~ +2 to +5) for added depth.
If you want, I can also create a Lightroom preset (.DNG) based on these settings so you can apply the same effect instantly to any sunset photo.
Sunset Tone Lightroom preset Free Download
Read Full Process For Better Understanding This Blog for Lightroom Preset Sunset Tone Effect.
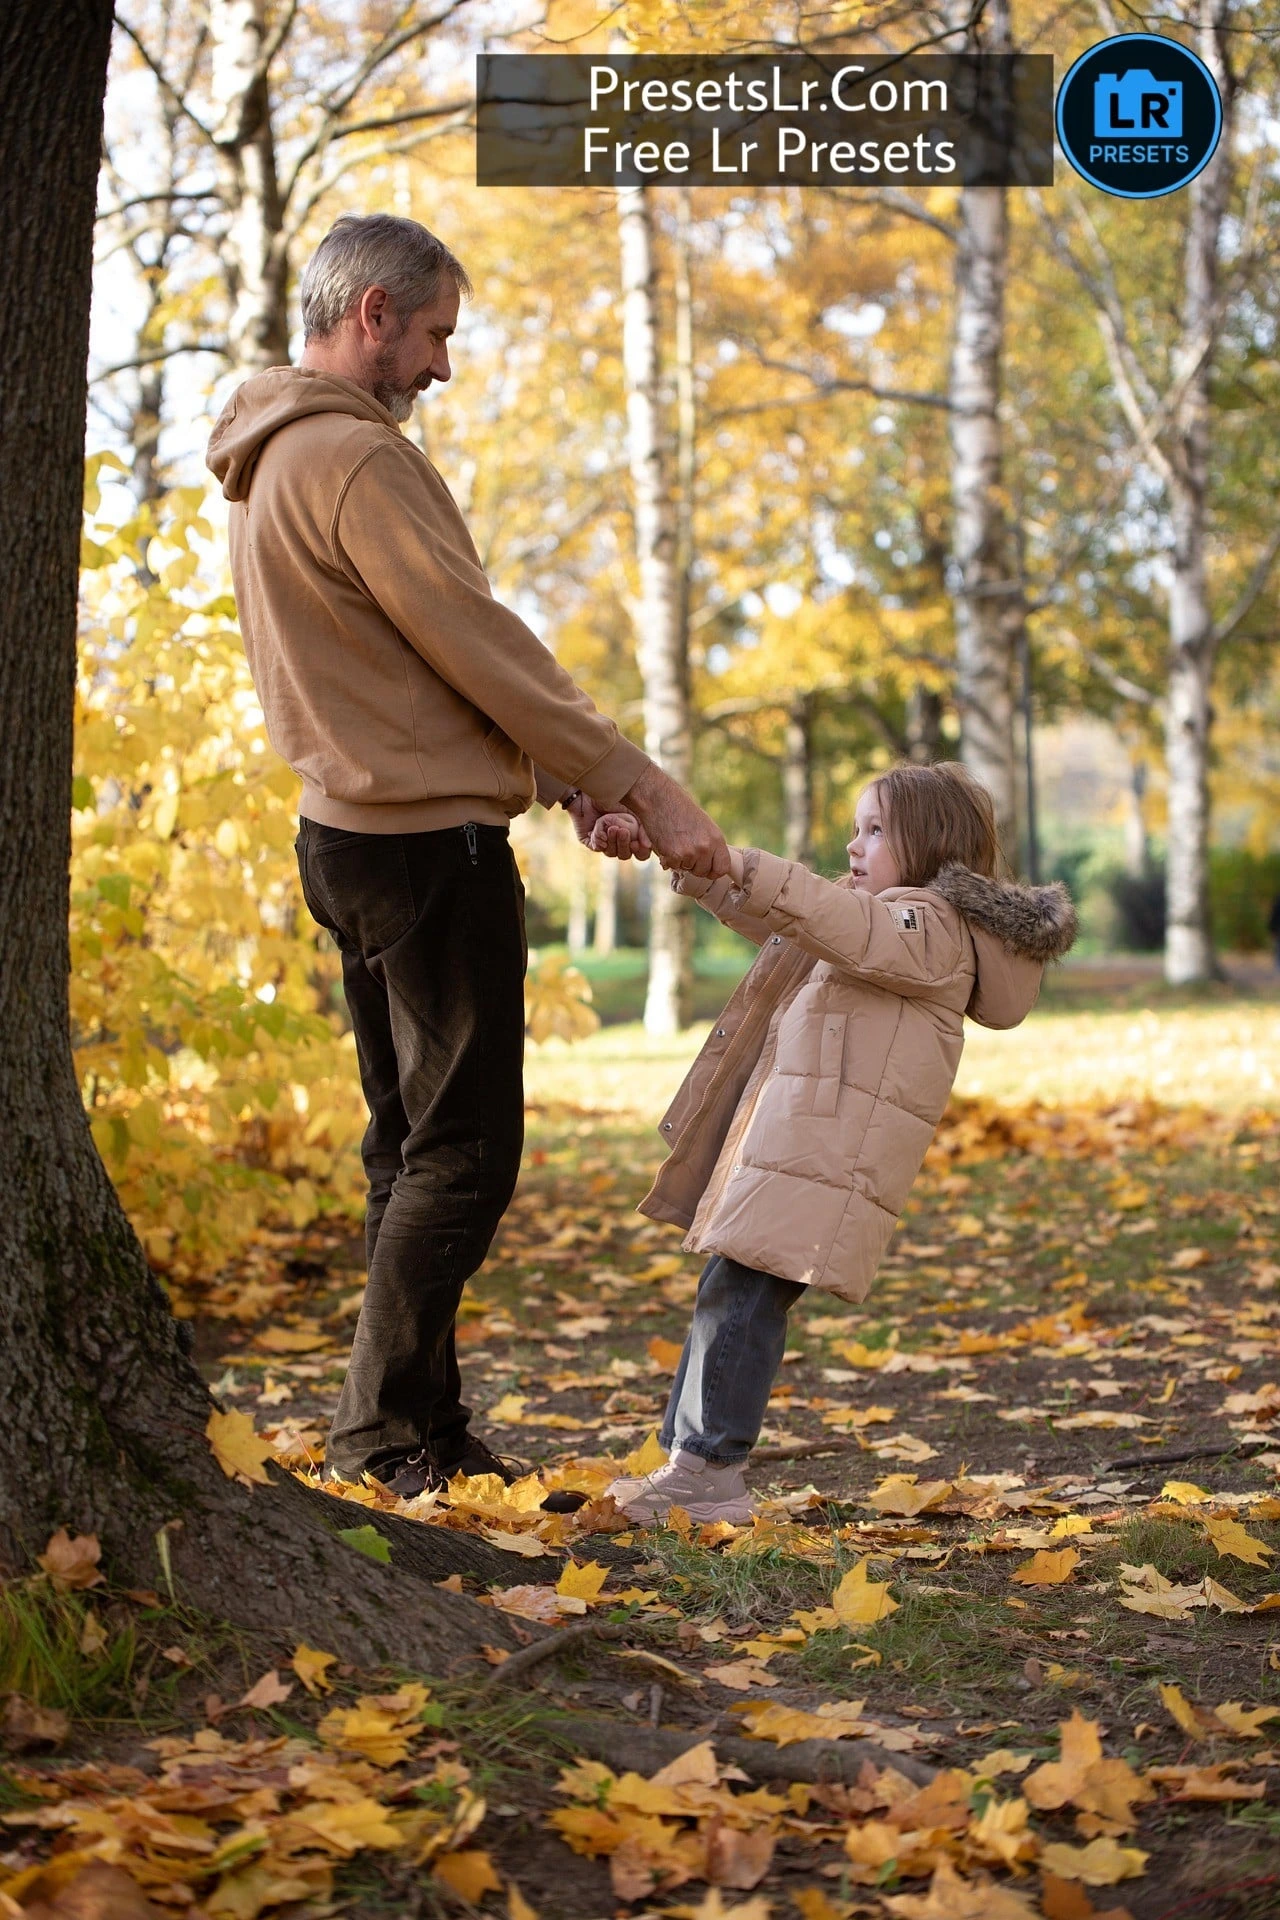
we are going to do some this type of sensor type of photo editing so first of all you see the before and after of this photo so this is the before and after of the photo which was looking very good after coding and remember one thing whatever I will teach you in this video will work only on the subset photo and I meant to say that you also have to click some this type of sunset type of photo now the timing of the sunset is 620 to 640 is fine.
I will open my photo Lightroom Popup So this is my Lightroom Popup and here I had kept my photo open All Right So this is our photo and here you can see the quality etc.
I haven’t done anything yet, so I’ll first paste a copy of this photo here. Okay, I’ve just made a video on top of the Because tool. Now the next video I think I will upload the same ok, I go out first and here I show you all the prises Okay,
Okay so here I will go I will click here pay three dot ok here I will just copy the cord so click three dot pay I will go to copy settings and here I will first delete it ok de-select it then I will come to lights after coming to end lights I will select this is the bottom curve here I will come back and I will do the top one I will come back after doing the end one and I will paste my photo here now I have pasted the curve till the rest of the thing I will give you
It’s okay to manually add and show, so here at first I can see that our photo is looking very dark, so here I will come to the lights first and if the photo looks dark, then first you have to reduce the contrast. Okay, so I’ll reduce the full contrast here, right now the photo looks a little bit better, but still looks a little bit dark, so I’ll go over here, I’ll make the end shadows full plus, now you can see here, after making the shadows full plus, a little bit of light means the photo looks bad, a little bit of fabric color
Okay, so first of all what I will do is I will reduce the contrast a little bit at least 90 and now a little bit of contrast is there, the rest of the shadows etcetera have become a little bit more, so here I have reduced the shadows also a little bit around 84 ok, it looks perfect, the rest of it I think so I should work a little bit in black ok, the shadows have been constricted, the rest of it here I will work a little bit in black as well, so here you can see a little bit here, you can see a little bit here, you can see a little bit of zoom out, you don’t see anything there, okay.
What I will do is increase the lighter blacks, so from here I will not make full black, okay, you can see I think so full, not full, no, okay, here pay and I think not much, I will make it minus. Okay I think I will do minus so it looks perfect the rest of it I will do a slight plus do one thing I will make it a complete plus and after that I will reduce the exposure ok and I will make it a slight minus ok so you can see-
The dark part which was inside the photo means neither the photo looks dark does it look light. Here we mean lighting our balance is done rest here I will make it slightly white minus and here if I make the high lights more then it looks bad then I will reduce it ok so here I reduce it I’m round 33 ok round 33 it looks perfect so here you can see what we mean by the whole lighting adjustment that we had inside the photo we did it quite well okay a lot of thought will go into it
Brother, you have done everything in the cut, so I will teach you not to worry about the cup tool, okay, the next video I will upload the same or the next video is okay, so in that, because we do not have to explain in a very good way, okay, so I am making a lot of mistakes, so I do not want anyone to learn from my mistake, okay, so here I go back and here right now I will zoom out the photo, and here we work on yellow, okay, so I will go to yellow.
So right now I’ll bring it to the orange side so it’s a little bit matching the photo right now. alright Tomorrow the raiding is looking a little better so I’ll make it minus 67 the rest of the situation I’ll make it a little bit more minus okay plus won’t do plus I’m going to get weird. alright Looks saturated ok so I will slightly minus the saturation ok Around-50 seems to be a little better, now I’ll make the rest of the ness a slight plus I’m around plus 16 doesn’t seem to be perfect I’ll go to the rest of the light blue and light blue is a light full job I think minus the socko
Okay, doing plus makes the photo look bad because we have bad sunlight behind us, so brother, you can understand if you make the blue too dark, then it will look bad, the rest of it will be dark blue, I will take it to U light blue, light will be light and light blue, so all right, our session is minus, so the mulb minus will work, okay, I will make its session minus, and I will make its plus because the photo lighting will be fine for us, okay, our photo lighting will be fine, so I will make the pulse plus, okay, I will lighten the rest of it, okay, I will go to light blue.
I will make it a little bit minus the rest of the pink what do I do a little bit what do I do this I think so I should do a little bit okay the rest of the session I think is to do a little bit minus and okay so it looks perfect okay means okay Photo’s before and after are good right now. Photo Before and After is a light match It’s okay from our tomorrow, you have to keep offering before, only then you will know what is the defect in your photo, okay, what is the deficiency, the rest will come here, okay. colors p and here I add the temperature
I’ll give it around 10 ok I want to put a little bit of yellow inside my photo Because behind is the sunlight, so brother, it’s a normal thing, slightly lower is better, okay, and I’ll make the tent slightly lower, okay. I’ll lighten up the rest of the tat around mine as well, and it looks fine All the rest of the photos you guys think, brother, this photo has turned out to be a little different and I’m going to hit Instagram2 Okay, light means very light blue tone Okay, here I think it’s 11 down, blending, not blending, I’m going to minus the luminous and I’m going to complete this blending.
Okay, so you can see before and after, okay, the rest here, I’ll come to the highlight and in the highlights, you can see I’ll do a little magic photo, the whole photo will look cool, and here I’ll take you to the yellow. Around 53 means 50 into 60 is fine 50.50 into 60 is fine and here I make 25 I’ll make the rest of the linens slightly minus around-1 and the blending eye think should be slightly reduced to -90 ok so it looks perfect You can see the end
Okay, we added a little bit of yellow tone, a little bit of light in the highlights, it felt good, okay, the rest of our photo, inside it, we’ll make more adjustments, okay, so here I’ll make the effects and texture slightly minus, the rest of the cut will also be slightly minus, and D will be slightly plus, okay, I’ll come to the rest of the vignette and after coming to the vignette, I’ll make the vignette slightly minus, okay. Around-10 it gives a different life to our photo okay rest here pe sharpness etcetera so we will add later okay rest inside the photo
What else do we have to do and I think so light mid point is not the mid point what is this second roundness ok so here I will make the round 76 I will make the end father around 36 ok so this is my personal setting ok means to add quality so this is how much I keep in each and every photo Okay, I will save the photo here in GPG and then I will add this photo of mine back to this, okay, now I had already added my photo, okay, I added it immediately, so here I have added it and here I am first.
What I will do is masking, not masking, first of all we will remove okay, so I will go to Remove here and whatever is the dark spots on our face, okay, we will remove them, okay, here I will reduce the size a little more.
I immediately remove that okay so here I have removed my entire dark spores you can give it okay how good it looks okay I have removed the rest which is our bottom side okay from the bottom side what we are seeing okay First what I will do here, I will make the size plus and zoom the photo, the rest of which is below us which comes up a little bit, inside our photo right now there is something that means that if it ever comes up in our photo below, you can remove something from you and see it here.
After doing that it looks slightly like yes I have removed something ok so if we have to tick I will remove it in a good way inside the photo, okay, so I will increase the size to 26 and I will apply it properly, okay, I have to remove it, so I will brush it properly, and I will remove it in such a way that the rest of the fill looks lighter now, okay, so what I will do here is, I will lighten it slightly, okay, so now it looks a little perfect, okay, the rest of it here, which is also lighter on the side, okay.
If you get a little bit of dust etc. inside the photo, then you remove it, okay, these small things look good inside your photo. Okay, I’ll remove it, I mean, it’s nice if you put a small thing inside your photo. alright If you have noticed even the smallest thing in the photo, you can see it here. Before and after ok how nice it looks ok I will go to the rest of the masking and here I will select on the color range and I will zoom my face completely ok take the photo near the face
I will put it in the middle and this is the part I will apply on my skin ok, on the skin I will put it on the face and here you can refine if you keep it full then the whole fotor will be selected and as you reduce it your face will be selected ok, so you have to do it in a good way to hold your face until it is complete and then you have to come to the effect and after coming to the effect you have to minus the texture ok. how is yours by texture minus Face means smooth, so this is mine.
There is a shortcut method, okay, I will make the rest of the cut slightly minus here, a lot of people use the brush for an hour and then smooth the face, so this is my short method. alright Because our R was looking a little bit lighter and here I will make the Kant slightly minus so here you can see Before and After is looking quite good alright Light fluffy face is smoothed, so the rest of the sharpness will come here and I will make the sharpness around plus. ok
There’s around 80 bcoz all ready I’ll make instagram2sh my plus Rest of the details here I will keep it to two ok, rest of the details I will keep it around 70. All right there is quality inside my food so by adding more quality I don’t mean I will go into the rest of the effects and I will make it minus 1 and clarity plus around 8 and dich also slightly plus ok because those photos I mean what we did was a little bit more light winet then I will slightly minus the rest of the winet
Back around 8 minus 8 ok and at y I will put the mid point back to 37 ok so 40 also looks fine and f not around here I will have more T a ho ja yaar bhai kya problem hai yaar isko isko around e dunga 99 baki green pa will come and green we will add inside our photo Around 10 is fine and I will keep the size at 15 ok, keep it small so keep it light on ok and after the lights come on I will make the lights plus so how do we get a light from behind us means a light will come from our background ok, a light will come from behind our body ok. I’m not talking about minus plus Sorry plus 1.1.12 I’ll keep it ok you can see it’s a light c coming from the back
So what I’m going to do here is I’m going to add it as sunlight, okay, so I’m going to make the saturation around + 20, okay, but it’s still looking a little bit yellow, okay, so I’m going to make the temperature around + 21, okay. Right now inside the photo, it seems that there is no sunlight coming from my background. All normal thing is coming butt one which is coming from behind one my light is coming na I added inside masking that is a different meaning inside the photo one knows
Okay the photo looks like a different meaning a vibe ok that means it looks like brother is looking realistic ok so this is what I did a little bit of cut I did inside my photo because normal as usual I did normal color gading like every single photo I did not feel anything special inside the photo so this is what I did a little bit yesterday one of my slogans I put a little bit of logic and I did a little bit of creativity inside it inside my photo sunlight is coming from behind you can see you are doing quite well I think so not so high
That doesn’t mean it shouldn’t go up Because realistically we’re a little fucked up so I think it’s alright is there anything down here I can probably get back I’ll put it up a little bit because I put it down a bit too much and it doesn’t come down that much. Because in our background there is all ready pad etcetera so brother so down so light will not come ok so we keep our background pad so much I’m going to make it a little thinner and I’m going to make it the size that’s on the side so I’m okay the rest looks so perfect and here it is
But I will do my photo, you can see it here, before and after is quite good. Our photo was made a light was added from the back of our photo started to look even better before and after you can see it’s ok. Here you can also see the quality etcetera, very good quality has been added inside our photo and all done we have done all the editing ok As it is I hope you have understood everything very easily